Saturday, August 30, 2008

Coconut Peach Clafoutis

I've been meaning to post this for awhile now! I've been a bit busy since I flew home, cooking up a storm in my kitchen that I miss so much, but I will get to that later! Along with last weeks Ratatouille I figured we needed to have a French dessert and have been wanting to make clafoutis for some time now. Still in love with my mini tart pans instead of making it in one big dish I decided to make individual clafoutis! I tweaked the recipe and replaced cream with coconut milk and to enhance the flavor I also added toasted coconut. A clafouti really just reminds me of a more refined smooth bread pudding (oh yeaa another one of my favorite comfort foods!). Super easy to make, if you can make pancake batter you can definitely make this! I was kicking myself as I finished pouring the last of the batter into a tart mold because I had meant to also make a cherry clafouti (the most traditional) and had even bought cherries at the farmers market! Oh well next time, plus I think almond would pair better with cherries than coconut. (A splash of amaretto perhaps? Oh yes I can see it now). You can see in the pic below a couple were made with blackberries since that was one of my friends fave fruit. Good way to utilize my blackberries since I didn't trample through the UBC farm's blackberry bushes at 9 on a sunday morn for nothin! (Took a bit longer than I thought only due to the fact that this is how picking went: One for me, one for the bucket...I felt a bit ill after...) These were topped with coconut ice cream but any cream topping will work! Whipped cream, creme fraiche, Greek yogurt, ice cream, its alll goood.
Above: Batter being poured into the tart pans
Below: Cooling just a tad before serving
Coconut Peach Clafoutis
Butter and sugar (to coat pan if using a baking dish)
Peaches, sliced (or any fruit you like)
1/3 cup flour
1/3 cup sugar
1 tsp vanilla (or coconut extract)
1 cup coconut milk (or cream or milk)
3 eggs
1 tbsp melted butter
toasted shredded coconut

1.Preheat oven to 350 degrees F.
2. Place flour and sugar in a bowl and mix. Add in coconut milk and vanilla and eggs. Whisk until smooth but do not over mix.
3.In a baking dish or individual tart molds place peaches and toasted coconut. Pour batter over top.
3. Bake for 35-40 min or until puffed and golden

Tuesday, August 26, 2008

Ratatouille: Layered and Baked with Goat Cheese and Bread Crumbs

Ahh I am reveling in the fact that I am DONE school! My brain and body have been so exhausted but what was one of the first things I wanted to do to celebrate? Cook of course! I was supposed to go out out downtown to celebrate but cancelled in favor of staying in to cook with good friends, good food and a bottle of wine! Here I go with the local again: local bell peppers, eggplant, zucchini, onions, garlic, basil, goat cheese and a rustic country loaf from the Trout Farmers Market, as well some delish sausage from Oyama Sausage company on Granville Island. In the more non-traditional way we layered the veggies, made a chunky tomato bell pepper sauce and topped it with a feta, goat cheese bread crumb topping. Also don't forget that good crusty bread is KEY for mopping up all the saucy goodness. Such good comfort food I tell you! Oh and yea yea, make fun if you will but of course we watched Ratatouille while we cooked!
I flew back to Calgary today to visit the fam and loved this meal so much I had to make it again. Anybody that knows me knows I do not travel light...(this is where my pops reads this and shakes his head because he has sworn never to travel to Europe with my mom and I ever again! Possibly a contributing factor was the extra suitcase we had to buy in Italy for my aged balsamic, truffled honey, foie gras and olive oils?!) I swear I try, I really do mean to pack light...but this time I neeeded to bring this stuff home...! Yes, that meant I lugged home canned San Marzano tomatoes, wine from a local berry farm, fantastic rustic country bread and a baguette, heirloom tomatoes, purple carrots, zucchini, peaches, cherries, roasted hazelnuts, 49th parallel coffee and Oyama sausages. If you could have only seen me with my bags at the airport this morning and of course the damn siren went off because my suitcase was overweight! The Air Canada girl looked up at me, saw my alarmed face, took pity on me and let the bag keep on goin....Thank youuu Air Canada girl! You think I was going to a land with no food but seriously, B.C is where its at!
Above: zucchini layer of the Ratatouille

Below: round 2 of Ratatouille w/Oyama Sausage (lamb and date, lamb and feta and Italian pork and one of the reasons why my luggage was overweight including the ice packs I had to pack it with...)

Ratatouille
2 bell peppers (I used red and yellow)
1/2 onion
1 28 oz can whole tomatoes (I used San Marzano)
5 cloves garlic, minced
1/4 cup fresh basil, chiffonade
1 tsp fresh rosemary, finely chopped
sugar (to taste)
1/2 tsp chili flakes
s+p (to taste)
2 zucchini, sliced
1 eggplant, sliced
1 small pkg goat cheese
1/2 cup feta
1 cup bread crumbs
1/2 cup grated parmesan

1.Preheat oven to 375 degrees F.
2.In a pot saute onions until soft and translucent, add in bell peppers, cook till soft then add garlic. Add tomatoes and reduce down until it becomes thick. Add in basil and rosemary, season with s+p, chili flakes and sugar to your liking.
3. Layer starting with tomato bell pepper mixture,then eggplant, then zucchini then more sauce, repeat ending in sauce.
4. Sprinkle with feta and goat cheese then mix together parmesan and breadcrumbs and sprinkle on very top. Bake until golden brown and bubbly, approx 30-40 minutes. Serve hot, room temp or cold.

Tuesday, August 19, 2008

Salad of Mixed Greens, Bing Cherries, Feta, Hazelnuts and Grilled Chicken

Oh woww so I can tell you just where to go when you have those serious boredom munchies and need to stop yourself from scrummaging through the fridge, freezer and cupboard every 5 minutes to snack on somethin…the University library!! I swear I won’t talk about studying anymore because even I’m getting sick of hearing that damn word! After this Friday you and I both won’t have to hear it since that’s when I write my Nutrition final! I needed a change of scenery so I headed to the UBC campus library to get some real work done. I have never been in a place SO dead quiet. I definitely have to re-think my snack options for tomorrow when I go back, because have you ever tried to stick your hand in a bag of chips and eat it as quietly as possible? Okay I wasn’t eating a chip, I was eating crackers, but I think I may have severely annoyed the guy behind me. So off topic here…the whole point was that I was absolutely starrrving by the time I got home so I threw together a salad that turned out quite well! The picture above is a re-creation of dinner because I was so hungry I threw it on my plastic plate and ate it within 5 minutes (yes everyday I use the same plastic plate because I hate doing dishes and for some reason it seems so much easier to wash and dry this particularly fine piece of kitchen ware). Anywhoo…mixed field greens from the local UBC Farmers Market, local cherries and toasted hazelnuts that I picked up from the Kitsilano Farmers Market, local chicken breast from the local butcher shop and feta from the local Greek shop down the street. See a theme here? Local is where its at! Mixed together a simple balsamic vinaigrette with dijon and agave syrup and it was a perfect accompaniment for my 11:00 dinner. Oh and what am I going to do with this extra salad? I think this may be a better option for tomorrows library snack…

I’m not going to show you a picture of my plastic plate (that’s just embarrassing) but here is the pic of the salad packed up and ready to go for tomorrow!

Salad
Mixed Field Greens
Fresh Cherries (pitted and quartered)
Feta (crumbled) (Goat Cheese would be nice too)
Grilled Chicken
Hazelnuts (toasted and roughly chopped)
Balsamic Vinaigrette
Dijon
Agave Syrup
Balsamic Vinegar
Olive Oil
S+P
(Combined to your preferred taste, I like less olive oil than the typical vinaigrette)

Monday, August 18, 2008

Fully Loaded P.B Chocolate Chip Cookies

I couldn't bare to name these "everything but the kitchen sink"cookies. Who wants to eat a cookie like that? That could contain everything and anything! These little gems contain everything that I think goes well with peanut butter, including toasted coconut, rolled oats for a chewy texture, chocolate chips (of course!) and a hint of cinnamon. I've been looking for a cookie that makes me feel satisfied, so I don't have to eat 5 of them to kick my craving (oh wow I sound like an addict...okay I admit, I am a cookie addict!). So I came up with this recipe and I think these just may do the trick! I used sprouted spelt flour, unrefined sugar, agave syrup, unsweetened coconut (which when toasted brings out its natural sugars) and natural peanut butter. Oh and if you noticed in the background I have my books spread out on the kitchen table, I'm studying right?

Fully Loaded Peanut Butter Chocolate Chip Cookies
(This recipe makes approx 20 cookies, double recipe if you want more!)
1/2 cup butter, softened
3/4 cup unrefined sugar (or brown sugar)
1 tbsp agave syrup (can skip this if you don't have it and add a bit more sugar or use honey)
1/4 cup natural peanut butter (warm in microwave slightly)
1 egg
1 tsp vanilla
1 1/2 cups rolled oats
1/3 cup sprouted spelt flour (or regular spelt flour or whole wheat)
1/2 tsp baking soda
1/2 tsp baking powder
1/2 tsp cinnamon
1/4 cup unsweetened flaked coconut (toasted)
1/4 tsp salt
1 cup chocolate chips

1. Preheat oven to 350 degrees F. In a mixer cream butter, sugar, peanut butter, agave and vanilla. Add egg and mix.
2. In a separate bowl combine rolled oats, sprouted spelt flour, toasted coconut, baking soda, baking powder, cinnamon and salt. Mix into wet ingredients until just combined. Fold in chocolate chips
3. If using an ice cream scoop, slightly pat down dough. Bake for 12-13 minutes or until edges and the top turn slightly golden brown.

Saturday, August 9, 2008

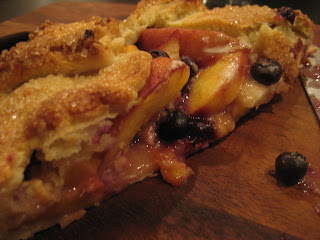
Blueberry Peach Galette

Galette, Crostata...whatev but Galette sounds so much prettier! This may come as a surprise (umm not..) but I was taking a study break flipping through a cookbook, when I came across a recipe for a peach crostata. It's nice that my roommates and I are all on the same wave length, as we're all in study mode. All of us sitting at the kitchen table leaning over our books, I popped up and said we need a study break snack! Never the type to argue on that one they completely agreed with me and offered to run down the street for ice cream to go with it. To be honest I haven't really made alot of pie pastry, my mom makes the best pies in the world so why would I need to? This recipe was super easy and the pastry turned out great! It truly is a lazy man's pie or should I say "rustic pie" man I love that word, anytime I mess up on something or it looks a little messy just call it rustic and all of a sudden wham u meant it to look like that! Even better that peaches and blueberries are in season and are already ridiculously sweet. Below is a pic with the ice cream (just for show since obviously that is not nearly enough ice cream for all of us!!). Back to work! Study break officially over!


Blueberry Peach Galette
Pastry Dough:
2 cups flour plus more when rolling out
3 tbsp sugar
1/4 tsp salt
3/4 cup cold butter, cubed
1 large egg yolk
2 tbsp ice water, plus more if needed

Filling:
4 large ripe peaches, thick slices
1 cup fresh blueberries
splash of lemon juice
2 tsp cinnamon
2 tbsp sugar
2tsp flour

1 egg, beaten with a splash of cold water
2 tbsp coarse sugar (I used raw sugar)
vanilla ice cream

1.For dough, combine flour sugar and salt. Add in butter and crumble until it becomes size of peas. Add in Egg yolk and ice water, mix just until it comes together, if to dry add more water. Form into a disc and fold in plastic wrap, let rest in fridge for at least 30 min.
2. Preheat oven to 475 degrees F. Roll out dough into a "rustic" circle about 14 inch round and about 1/4 inch thick. Place on baking sheet lined with baking paper. Mix together all filling ingredients in a separate bowl. Pile filling in the middle of the rolled out pie crust leaving about a 2 inch border.
3.Brush uncovered dough with egg wash and fold over the edges towards the middle. Brush the top with more egg wash and sprinkle coarse sugar on top. Bake for 30 min or until golden.
4. Serve warm, room temp or cold.


Friday, August 8, 2008

Pizza on the BBQ: Smoky BBQ Chicken & Pineapple and Three Cheese Veggie w/ Fire Roasted Tomato Sauce

Darnit! Here I go again! Why is blogging so much more fun than studying? Okay I know why, because I could talk about food 24/7. No joke, ask any one of my family or friends! People have dreams to fly, be invisible or go back in time, my dream would be to be able to eat everything and anything I possibly ever wanted and never gain a pound! Seriously.
Pizza on the barbecue!! Probably one of my most favorite things to make and eat ever, I feel like I say that about everything but I really mean it about this! So easy to make, once the dough is made and your sauce and toppings are prepped, you slap the dough on the grill and you'll be eating in less than 10 minutes. Quicker than delivery and so much tastier too. Toppings and sauce are key but I think its all about a good crust, none of that doughy bready crust, I like a nice chewy but crispy more thin crust. This version has all of that and also a touch of smokiness that comes from the bbq. I should mention this is the point when mid typing, I had to go to the kitchen and grab another slice of pizza from the fridge, just typing about it made me want some more! What's a girl to do with all this pizza? Well the reason I made extra was so I can eat this for the rest of the week and not have to worry about cooking when I should be studying ( oh wow that sounded like a poor excuse even as I wrote that! That has never stopped me from cooking before!). Actually I'm not so big on leftovers but this? I could eat every single day, it tastes great cold and freezes even better. Go heat up your grill now...I swear you won't want any other pizza after you taste this.


After the crust has been cooked on one side, flip it over, add sauce and toppings and close the lid to let the bottom cook and the cheese melt.


Pizza Dough (makes 2 large pizzas)
2 tsp yeast
1 cup plus 2 tablespoon warm water
3 cups bread flour or all purpose flour (I used 1/2 spelt, 1/2 white flour)
4 tsp sugar
2 tsp salt
2 tbsp extra virgin olive oil plus 2 tsp to grease the bowl you proof it in

1. Combine yeast, warm water and sugar, let sit 5-10 min till the yeast puffs up
2. Place yeast mixture in mixer, add olive oil and mix. (Start with paddle attachment), or if by hand, start with a spoon and then use
your hands to incorporate the rest.
3. Slowly add ½ the flour, add salt and add in the rest of the flour. Change to dough hook
4. Mix for 1 minute until dough comes together, might have to add a bit more flour, should be soft but not to sticky. Knead by hand for 20 seconds
5. Place in a bowl coated with the remaining oil, make sure to coat dough in oil as well, place saran wrap overtop and let proof (rise) for about 1 hr to 1½ hrs.


BBQ CHICKEN PIZZA
Pizza Dough recipe
Cornmeal
Olive oil
Sweet smoky bbq saucePineapple
Sliced Chicken, cooked (toss in BBQ sauce as well)
Thin Sliced Red Onion (optional)
Cilantro (optional garnish)
Aged Cheddar, gruyere (or any cheese you want)
Zucchini (optional)

1.Preheat bbq on high
2.Roll out dough until thin, can be odd shaped, coat both sides of dough with olive oil and cornmeal. Place on baking sheet
3.Place dough on grill and cover lid for 1-1 1/2 min, bottom side should have grill marks but not be completely burnt, flip dough over and cook the other side with bbq lid down. Dough is done when you can knock on it and it sounds hollow
4. If you're quick, add sauce and toppings and close the grill while the other side cooks OR take off the grill, place on foil lined cookie sheet, assemble pizza, place back on grill or hot oven until cheese is melted. Garnish with cilantro


3 Cheese Veggie w/ Fire Roasted Tomato Sauce
Aged Cheddar
Gruyere
Feta
Zucchini
Mushrooms
Pineapple

Fire Roasted Tomato Sauce
1 14.5oz can crushed fire roasted tomatoes
olive oil
3 cloves garlic
fresh basil, chiffonade
1. Saute garlic in olive oil, add tomatoes, let reduce down for 5 m in
2.Add in fresh basil
3.Proceed with same process as other pizza

Tuesday, August 5, 2008

Baked Yam Fries with Balsamic Glaze

Love love love these, I think I even like them better than regular fries! There is a key to making sure they come out crispy: When you spread them out on the baking sheet, they need to be evenly spread out, barely touching and not piled on top of each other. If that happens the yams will start to create moisture and steam instead of dry out and you will end up with soggy fries! Baked not fried, these crispy yam fries are packed with beta carotene and vitamin C and are one of the best side dishes to any burger, bbq turkey burgers in this case! Drizzled with balsamic vinegar that I reduced and a sprinkle of fleur de sel, who needs ketchup or aioli?!

Baked Yam Fries (4 servings)
3 large yams-cut into sticks
oil
s+p
fleur de sel or coarse salt

1.Preheat oven to 400 degrees F. Toss yams in oil just enough to coat. Season with s+p
2. On a baking sheet lined with baking paper spread out yam fries evenly and bake for 40 min or until golden and crispy, checking halfway through to turn fries over for even color.
3. Before serving, drizzle with balsamic glaze and fleur de sel or coarse salt.

Balsamic Glaze
1 1/2 cups balsamic vinegar

1. In saucepan add vinegar and on medium-high heat reduce vinegar slowly until it becomes thick and coats the back of a spoon.
*If for some reason you over reduce it, you can just add a splash of balsamic vinegar to bring it back to the consistency you like.

Sunday, August 3, 2008

Blueberry Crumble Squares

I wasn't supposed to make these...I should have been studying for my nutrition final, but in my defense I was on my study break when I came across a recipe for blueberry crumb squares! It really only took 15 minutes from start to finish, including clean up so I'd say that's a pretty good break. If I find a recipe I want to try and I know I have all the ingredients, guaranteed you will find me in the kitchen 2 minutes later pulling everything I need out of the fridge and cupboard, hence the 5 minute buttermilk chocolate cake recipe! Once again I switched it up, instead of white flour I used whole wheat and spelt flour, instead of white sugar I used unrefined sugar and for texture and health benefits some ground flax seeds. Yes, it does still contain butter but we all know butter makes things taste better! So my thinking is change what you can when you can but never try and change something to the point that it won't taste good! I use alternative flours in specific recipes not only because they are better for you but also because I love the nutty flavour they can add to baking. Also knowing when to incorporate these alternative flours helps too. I would never try and make croissants using spelt flour because you need the white flour for the light delicate texture of croissant dough, where as with these bars I know it is a more dense heavy bar so it will work well. Sometimes it's all about trial and error! After having a bite (see picture below, I couldn't resist) I could have sworn it tasted like ground almonds in the square but really it was the whole wheat/spelt flour and flax that made it taste so good. I used blueberries since they are in season but most other fruits will work too!

Blueberry Crumble Squares (makes 16)
1/2 cup unrefined sugar
1/2 tsp baking powder
1 cup whole wheat flour
1/2 cup whole grain spelt flour
1/4 cup ground flax seeds
2 tsp ground cinnamon
1/2 cup butter (cold)
1 egg
1/4 tsp salt
2 cups blueberries
1/4 cup unrefined sugar
2 tsp cornstarch

1.Preheat oven to 375 degrees F. Grease an 8x8 pan
2. In bowl add the 1/2 cup of sugar, both flours, baking powder and salt.
3. Cut butter into dry mixture until it is the size of peas. Add egg and stir till combined, mixture should be crumbly.
4. Pat half the mixture into prepared pan
5. In another bowl combine the 1/4 sugar with blueberries and cornstarch. Sprinkle in pan and crumble remaining dough over the berries.
6. Bake for 30-40 minutes or until golden.
7. Let cool before cutting, can be stored in fridge.

Friday, August 1, 2008

Applewood Smoked Cheddar & Dill Buttermilk Biscuits

I love biscuits. I would even go as far and say these might just be one of my top comfort foods. Nothing better then a warm biscuit pulled straight out of the oven with the buttery and flaky layers and the steam coming out when pulled apart, oh yumm. I usually make a good ol aged cheddar biscuit but this time I thought I would do something different. Still using cheddar, but instead Applewood smoked cheddar and some fresh chopped baby dill this new and improved version may just be my favorite yet! Served sandwiched between some barely cooked scrambled eggs or along side a roasted tomato bisque on a rainy day, that's total comfort to me.

Applewood Smoked Cheddar & Dill Buttermilk Biscuits
2 1/4 cups all purpose flour
1 tbsp granulated sugar
2 1/2 tsp baking powder
1/2 tsp baking soda
1/2 tsp salt
1/2 cup butter, cold and cubed
1 cup Applewood smoked cheddar
1/4 cup fresh baby dill
1 cup buttermilk
1 egg, lightly beaten

1. In a large bowl add flour, sugar, baking powder, baking soda and salt. Using a pastry blender or your hands cut the butter into the mixture until the butter is the size of peas.
2. Add cheddar and dill. Add buttermilk all at once and incorporate just until most of it comes together. (Should still have some crumbs)
3. On a lightly floured service place dough and crumbs and knead gently 2-3 times just until it comes together into a soft dough.
4. Gently roll out until 3/4 inch thick and cut out with cookie cutter.
5. Can use the remaining dough to make more biscuits.
6. Brush tops of biscuits with egg and bake for 12-15 min or until golden.